How to Transform A Shed Into A Cozy Cabin

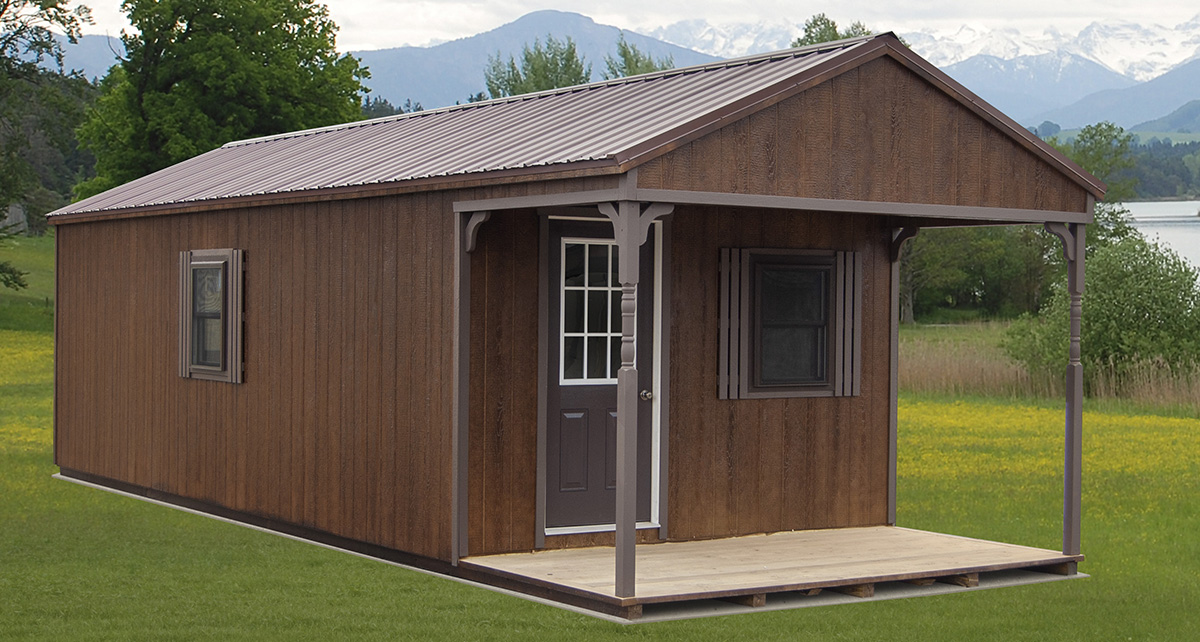
A storage shed can turn into a cabin with a few adjustments and upgrades! At Pine Creek Structures, cabins are custom built for you. You can specify exactly the details you need and want. You choose the size, colors, layout, and all the upgrades. You may choose to opt from a shell and finish the inside yourself OR you may choose to have the interior completely finished.

Cabin Style Buildings from Pine Creek Structures

When turning one of our buildings into a cabin, we recommend considering the following upgrades:

Upgrade from a plain shed door to a fiberglass house door. This upgrade really helps turn a shed into a cabin! A fiberglass house door with windows allow extra natural light inside and let you see who’s outside when you hear a knock on the door.

Add a porch. This helps make your building look more like a home. Porches provide a covered area outside to gather and enjoy nature together as a family. By adding a porch, you can also create a loft area inside for extra storage or sleeping space. Porches are available with or without railing.

Add venting. This is an important upgrade we recommend for every cabin! Venting allows air to circulate properly. A ridge vent and gable end vents allow warm, humid air to leave your cabin. Vented eaves provide a source of fresh, cooler air to help push warm humid air out ridge and gable vents. Without proper ventilation, your building will sweat trying to get the moisture out of the air. The humid air will create condensation inside your building. Humidity and condensation is problematic, especially so when you wish to have a finished interior!

Insulate the walls, floor, and/or roof and choose insulated windows and doors. Insulation helps keep the warm air from your heater inside and prevent the cold air from outside from sneaking in during the fall and winter. Several insulation options are available for the walls, flooring, and roofing. Insulated doors and windows are also available in a variety of style and sizes.

Increase the wall height. Depending on the size and style of the base shed you are customizing into a cabin, you may want to increase the wall height. This may be necessary for the upgrades you choose or simply for comfort.

Add extra doors and windows. Depending on the size of the cabin you choose, you may want more than one entrance/exit. Additional windows add natural light and create cool breezes on a warm days. They can be placed in almost any layout you desire!

Separate the space into rooms. In large cabins, you may want to split up the the space into separate areas, rather than have one huge common area. You may want rooms, closets, etc. We can frame out these rooms so they are ready for the interior finishing you choose to proceed with.

Choose a finished interior. While specialize in cabin shells, some fully finished interior options may be available in your area. If you desire interior finishing, discuss your options with you local store manager. Please note: Interior finishes often increase your building’s production time significantly (compared to a standard shed build).

Ask about electrical packages. Some DIY-ers feel confident finishing the interior themselves, but don’t have electrical skills. We have a variety of electrical packages available and can be customized with lights, light switches, receptacles, ceiling fans, baseboard heaters, mini splits, and more. Exterior light options may also be available.

Cabin Style Buildings from Pine Creek Structures

Pro-Tip: Before placing your order, make sure to check any regulations and codes set by your state, county, or township. Once your cabin is in production, changes are often costly and delay delivery. Make sure to communicate any state, county, or township requirements when designing your cabin with your local store manager. Due to varying policies, we are not responsible for making sure that your cabin meets your local regulations ourselves, but will gladly help you design a cabin that meets the requirements you inform us of.

Reorganize the Contents of Your Backyard Storage Shed: A Step-by-Step Guide

A backyard storage shed can be a lifesaver, providing much-needed space for tools, garden equipment, and seasonal items. However, it can quickly become cluttered and chaotic without proper organization! A well-organized shed not only makes it easier to find what you need but also maximizes the available space. Here’s a step-by-step guide to help you organize the content of your backyard storage shed effectively.

Step 1: Empty The Shed

Start by removing everything from your shed. This will give you a blank canvas to work with and allow you to see everything you have. Once the shed is empty, clean it thoroughly. Sweep out debris, remove cobwebs, and wipe down surfaces.

Step 2: Sort and Purge

Sort your items into categories such as gardening tools, sports equipment, seasonal decorations, kids items, and power tools. Within each category, group similar items together to make the organization process easier. Group items by when you use them or how you use them. Get rid of anything you no longer need or use. Donate these items if they are still in a safe and usable condition. Recycle or dispose of any broken, unsafe, outdated, overly worn, or unusable items. This will free up valuable space and make organizing simpler!

Step 3: Make A Plan And Get Any Needed Supplies

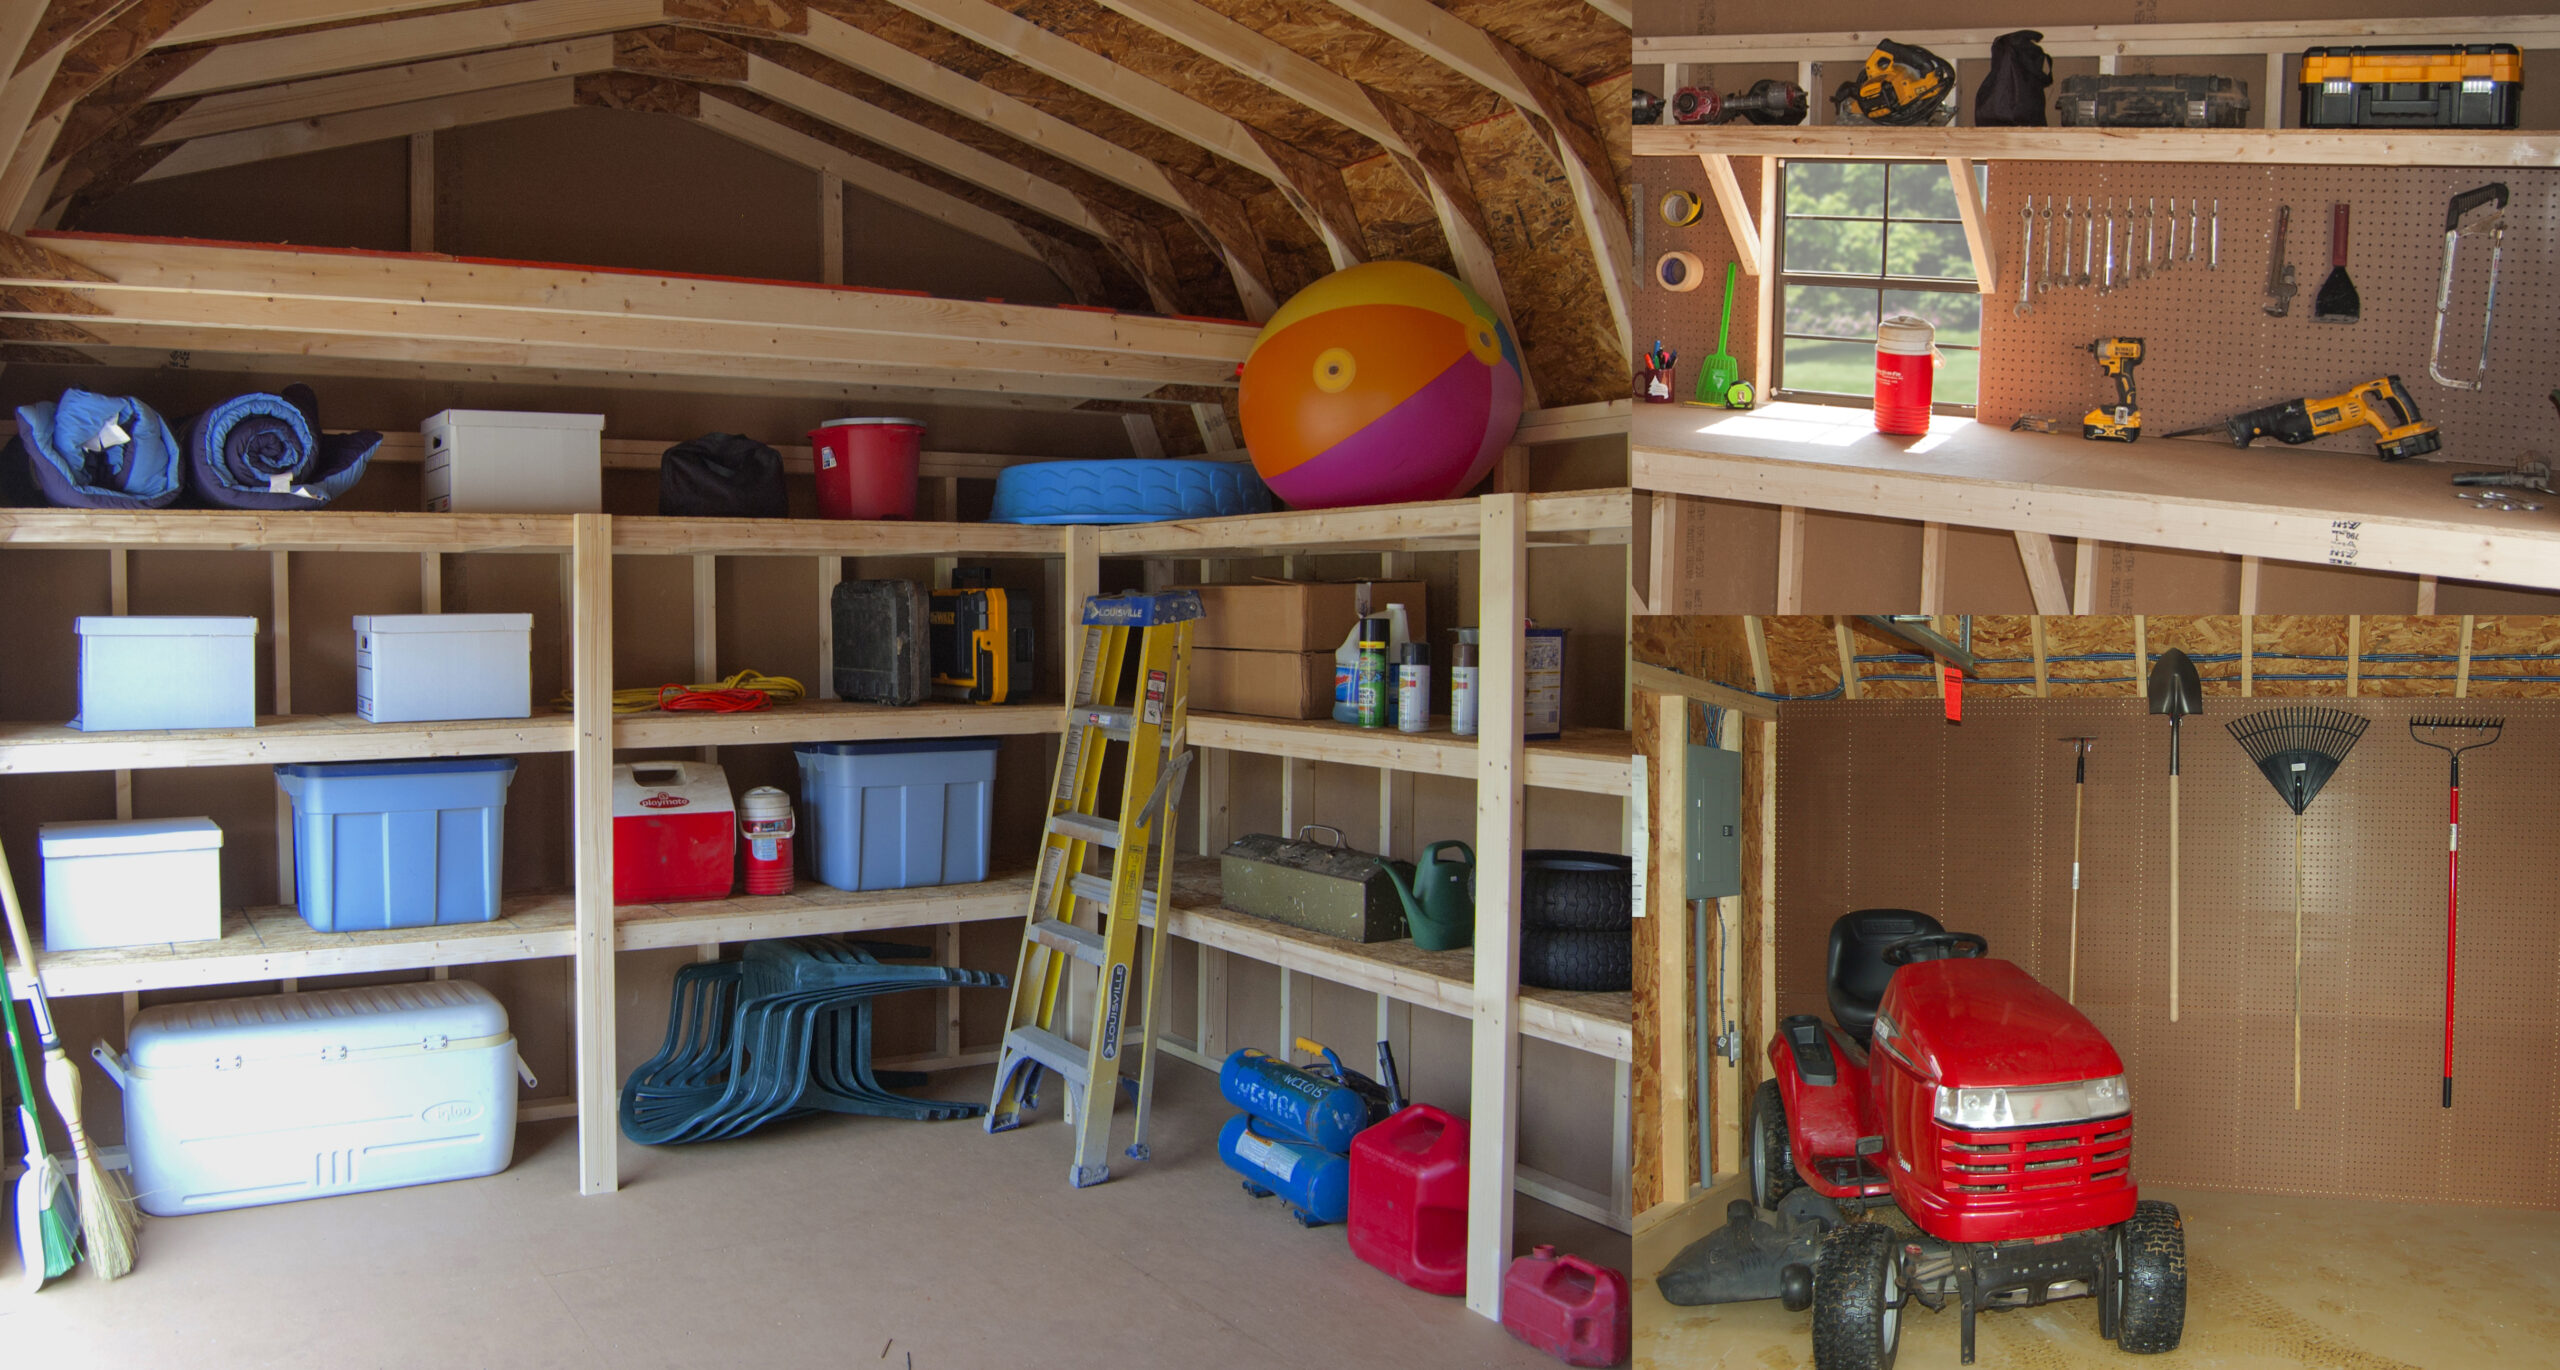
Look at the layout of your shed and decide how you can best utilize the available space. Consider the height, width, and depth of the shed and the contents that need to go back inside when planning your storage solutions. What are the biggest items you need to store? Where is the best spot to place them so that they are accessible and don’t block your path other items. Based on the items you need to store, choose appropriate storage systems such as shelves, pegboards, hooks, and bins. Shelves to keep items off the floor and maximize vertical space. Pegboards are super versatile for hanging items on hooks. Clear stack able bins (in various sizes) may be needed to keep items organized by category or use. Investing in the right storage solutions can make a significant difference in keeping your shed organized. 

Step 4: Implement Your Plan And Get Organized

Remember to place items use regularly use (such as gardening tools, everyday hardware, and kids toys) in easily accessible locations. Store seasonal items, like holiday decorations and seasonal sports equipment, in harder-to-reach places since they don’t need to be accessed frequently. If you have a loft installed, store away items that you don’t need to access often up in the loft. Organize small items and bins on shelves. Tools can be organized in tool boxes to grab and go easily. If you need access to specific tools often, keep them handy by organizing them on hooks on pegboard. Shovels, rakes, and ladders can also be organized on the walls with hooks. Use small, medium, and large containers to keep like-items together. Remember to label each container to be able to find items easily later. Clear containers are great because they allow you to see what’s inside! Choose bins that stack to stay space efficient. 

Step 5: Stay Organized!

This may be the last step, but it can be the most important! Make it a habit to return items to their designated spots after each use. This simple practice can prevent clutter from accumulating and needing to constantly reorganize. Set a schedule for regular cleanups and reorganizations. This could be seasonal or yearly, depending on how often you use the shed and store away new items.

By following these steps and tips, you can transform your backyard storage shed into an organized and efficient space that makes it easy to find and access everything you need. A well-organized shed not only enhances functionality but also adds to the overall enjoyment of your outdoor projects and hobbies. Happy organizing!

New Product Alert: 3 New Vinyl Play Set Models

Pine Creek Structures is excited to announce three new standard models to choose from when shopping for a play set for your kids! Our manufacturer, Adventrue World Play Sets has developed these three new models based off their clients feedback and previous orders. Introducing the Busy Base Camp Package #B44-8, the Discovery Depot Package #D48-2, and the Happy Hideout Package #H68-5. 

Busy Base Camp Package #B44-8

The Busy Base Camp Package #B44-8 standard model offers a basic play set with a unique two tower design design. This vinyl play set model includes two 4′ x 4′ towers (5′ Deck Height), Vinyl Roofs, two Entrance Ladders, two 5’ Rock Walls, 2-Position Single Beam, two Belt Swings, and two Wonder Wave Slides.

Shown above with standard almond vinyl, red roof, red railings and brackets, red slide, and red swings.

Discovery Depot Package #D48-2

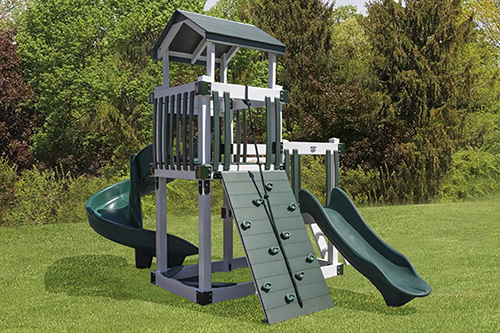
Discovery Depot Package #D48-2 Vinyl Backyard Play Set for Children
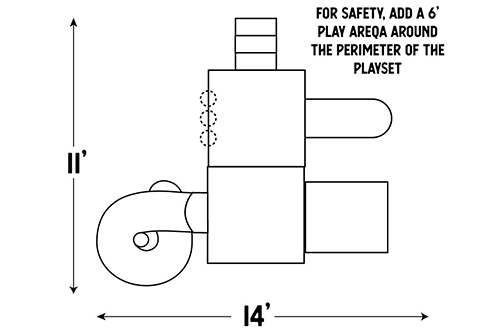
Discovery Depot Package #D48-2 Vinyl Backyard Play Set Layout Diagram

The Discovery Depot Package #D48-2 standard model offers unique compact design for yards with limited space. It does not include swings, but features a two level tower and two slides. This vinyl play set model includes: 4′ x 8′ Split Level Tower (3′ & 5′ Deck Heights), Vinyl Roof, Entrance Ladder, Rock Wall, Ripple Rush Slide, Super Spiral Slide, and a Tic-Tac-Toe Panel.

Shown above with premium white vinyl, green roof, green railings and brackets, and green slides.

Happy Hideout Package #H68-5

Happy Hideout Package #H68-5 Vinyl Backyard Play Set for Children
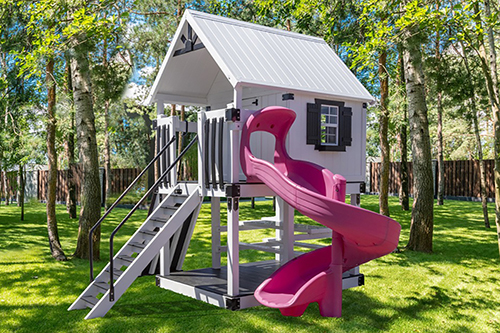
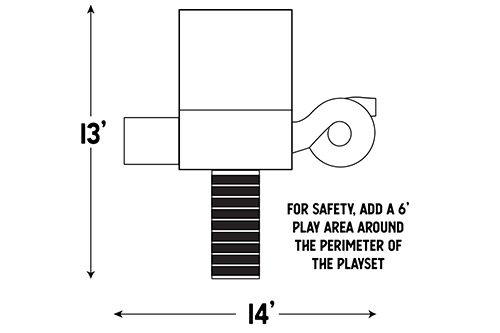
Happy Hideout Package #H68-5 Vinyl Backyard Play Set Layout Diagram

The Happy Hideout Package #H68-5 standard model is a compact design without swings is great for small spaces! It does not include swings, but features a play house and slide. This vinyl play set model includes: 6′ x 5′ Playhouse on 6′ x 8′ Deck Tower (5′ Deck Height), Grand Stairway, Rock Wall, Super Spiral Slide, 6×5 Picnic Table on 6×8 Lower Deck, Shutters and Flower Boxes, PLUS Your Free Item Choice (Detached Sandbox, Steering Wheel, Ship’s Wheel, Telescope, Megaphone, or Binoculars)

Shown with premium white vinyl, black railings and brackets, and pink slide.

These new standard swing set models are just 3 of the 28 standard packages available to choose from for your new play set! Every standard package is completely customizable… choose the colors, change the slides, swap out the swings for another style, and more! You can also build your play set from scratch and choose every component to meet your needs.